paddling

Cross Training: SUP, SUP Surf, Surfski and Outrigger

Cross training in ocean paddle sports is expensive. When I catch a wave on the ocean, any wave, I could not be more present and engaged, and every dollar I’ve put into my quiver is the investment in the highest quality of life. There’s no substitute for euphoria, except more euphoria. I found this NSP SUP surf board for $750 in the winter of 2021. It was an absolute bargain comparatively, and I ended up spending the entire winter on it.

Catching a shoulder high wave on an NSP All Rounder SUP surf board.

I bought two boards in the winter of 2021, after an outrigger race in 25-30kt winds, where the course was at odds with the wind, and I’d found myself heavily leaning left on my Puakea Kahele. At the time I wasn’t cursing the ama, the pontoon that makes a canoe an outrigger, as much as cursing out the race organizers for doing everything they could to turn optimal downwind conditions into a brutal up and sidewind race. A couple months later, as I settled into my new routine on boards, I discovered that favoring one side of the board over the other was impossible. Oscar Chalupsky’s chiding I remember well, about all outrigger paddlers leaning left. I think his chiding, during an immersion surfski clinic with him, was what made me work so hard NOT to lean left. And for the most part I don’t. Or I think I don’t. And I always say to people you don’t have to lean left, because the ama does it for you. But as a matter of fact, frequently you DO. Why? Because at 3-4’+, extended off the main hull, the ama and iakos act as a fulcrum pivoting the canoe on a wave. If you really want to learn to fly the ama, my advice is to get rid of it. The ama is a training wheel. Get rid of it by trying a less stable paddle sport like surfski or SUP. Both surfski and SUP respond much more to incremental changes in your body pressure, and you will learn a lot more about the cone of wave momentum immediately surrounding you. Then go back to the outrigger, and see if your sense of it has changed.

Ama Free

Learning to fly the ama on the surfski! :)

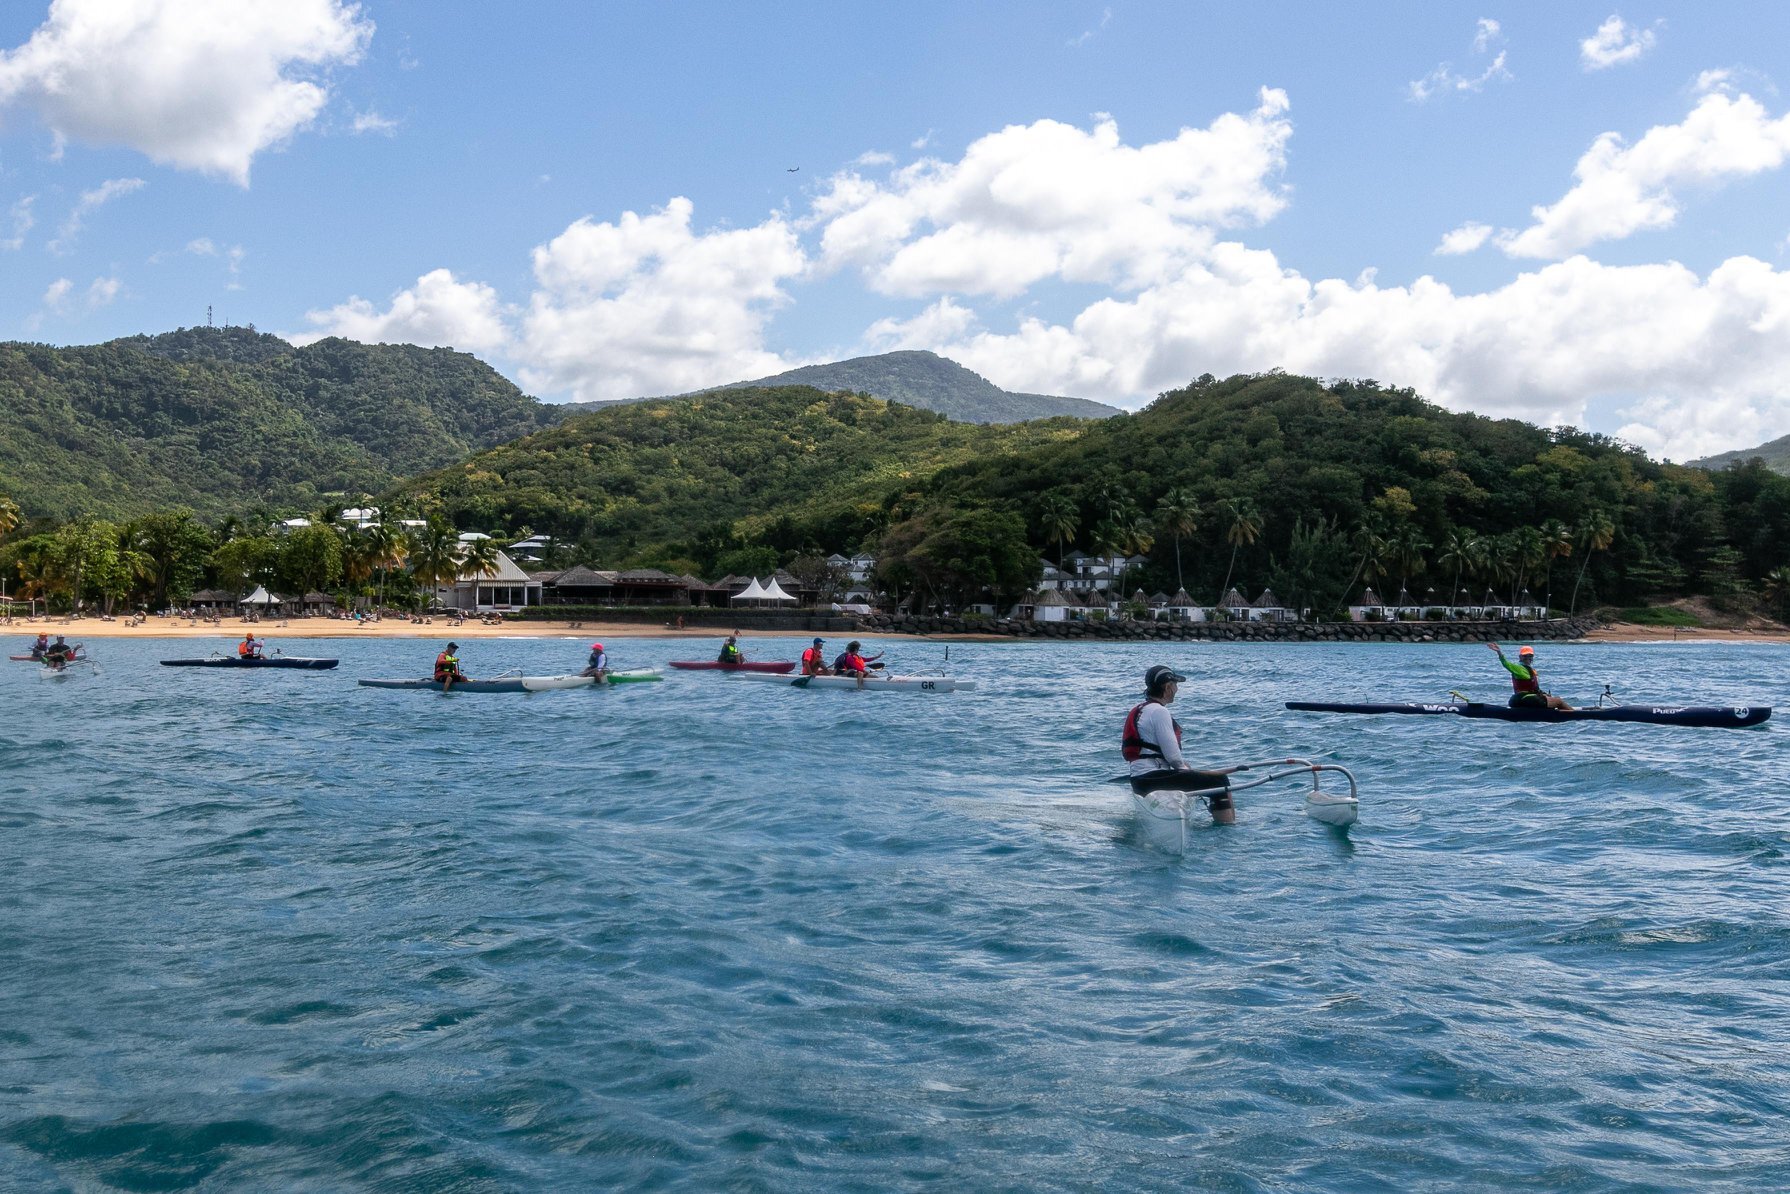
I know that buying all of these vessels isn’t realistic for most, so how can you realistically go about cross-training? 1: Join clubs that offer access to the vessels. 2: Sign up for clinics or lessons on other vessels. 3: Make friends! 4: Share! 5: Teach!

SUP is harder than surfski. Surfski is harder than outrigger. (And running is harder than all because you’ll need your knees replaced). Why do I choose 1: SUP, 2: Surfski, 3: Outrigger in this order?

Surfski Wipeout

Wave tossed the surfski over my head.

The answer is gravity. Your center of gravity is high above the water surface, so you are managing balance from a fairly awkward position. Surfski offers the lowest center of gravity, as the bucket seat essentially positions you at the water surface if not in it, but the cigar shaped vessels can easily roll if you are in line with the wave peak. That’s what happened to me in the above image. Outrigger is most stable because the training wheel ama spreads your buoyancy out over a larger area. Your seated center of gravity is higher, but some designs are placing the legs deeper into a cockpit, providing more comfort and gravitational stability. However, due to the friction or what is called “drag” on the water from the combined hull and ama, it is impossible for you to ever paddle as fast when you stroke on the right as it is on the left. Your right hand paddling is not just pulling you forward, it’s dragging the ama. If you’re wondering why your left arm paddle feels stronger than your right, it is exactly because your stroke is more centered in the drag and as such is better positioned to pull you forward. Learning to fly the ama, or momentarily get rid of the drag, will score you lots of enthusiasm on Instagram, but whatever you think you’ve gained you’ve lost by dragging the side of the hull in the water. It’s really popping the wheelie. I prefer the ama that isn’t there! My fastest speed this year has been on my rather stout NSP.

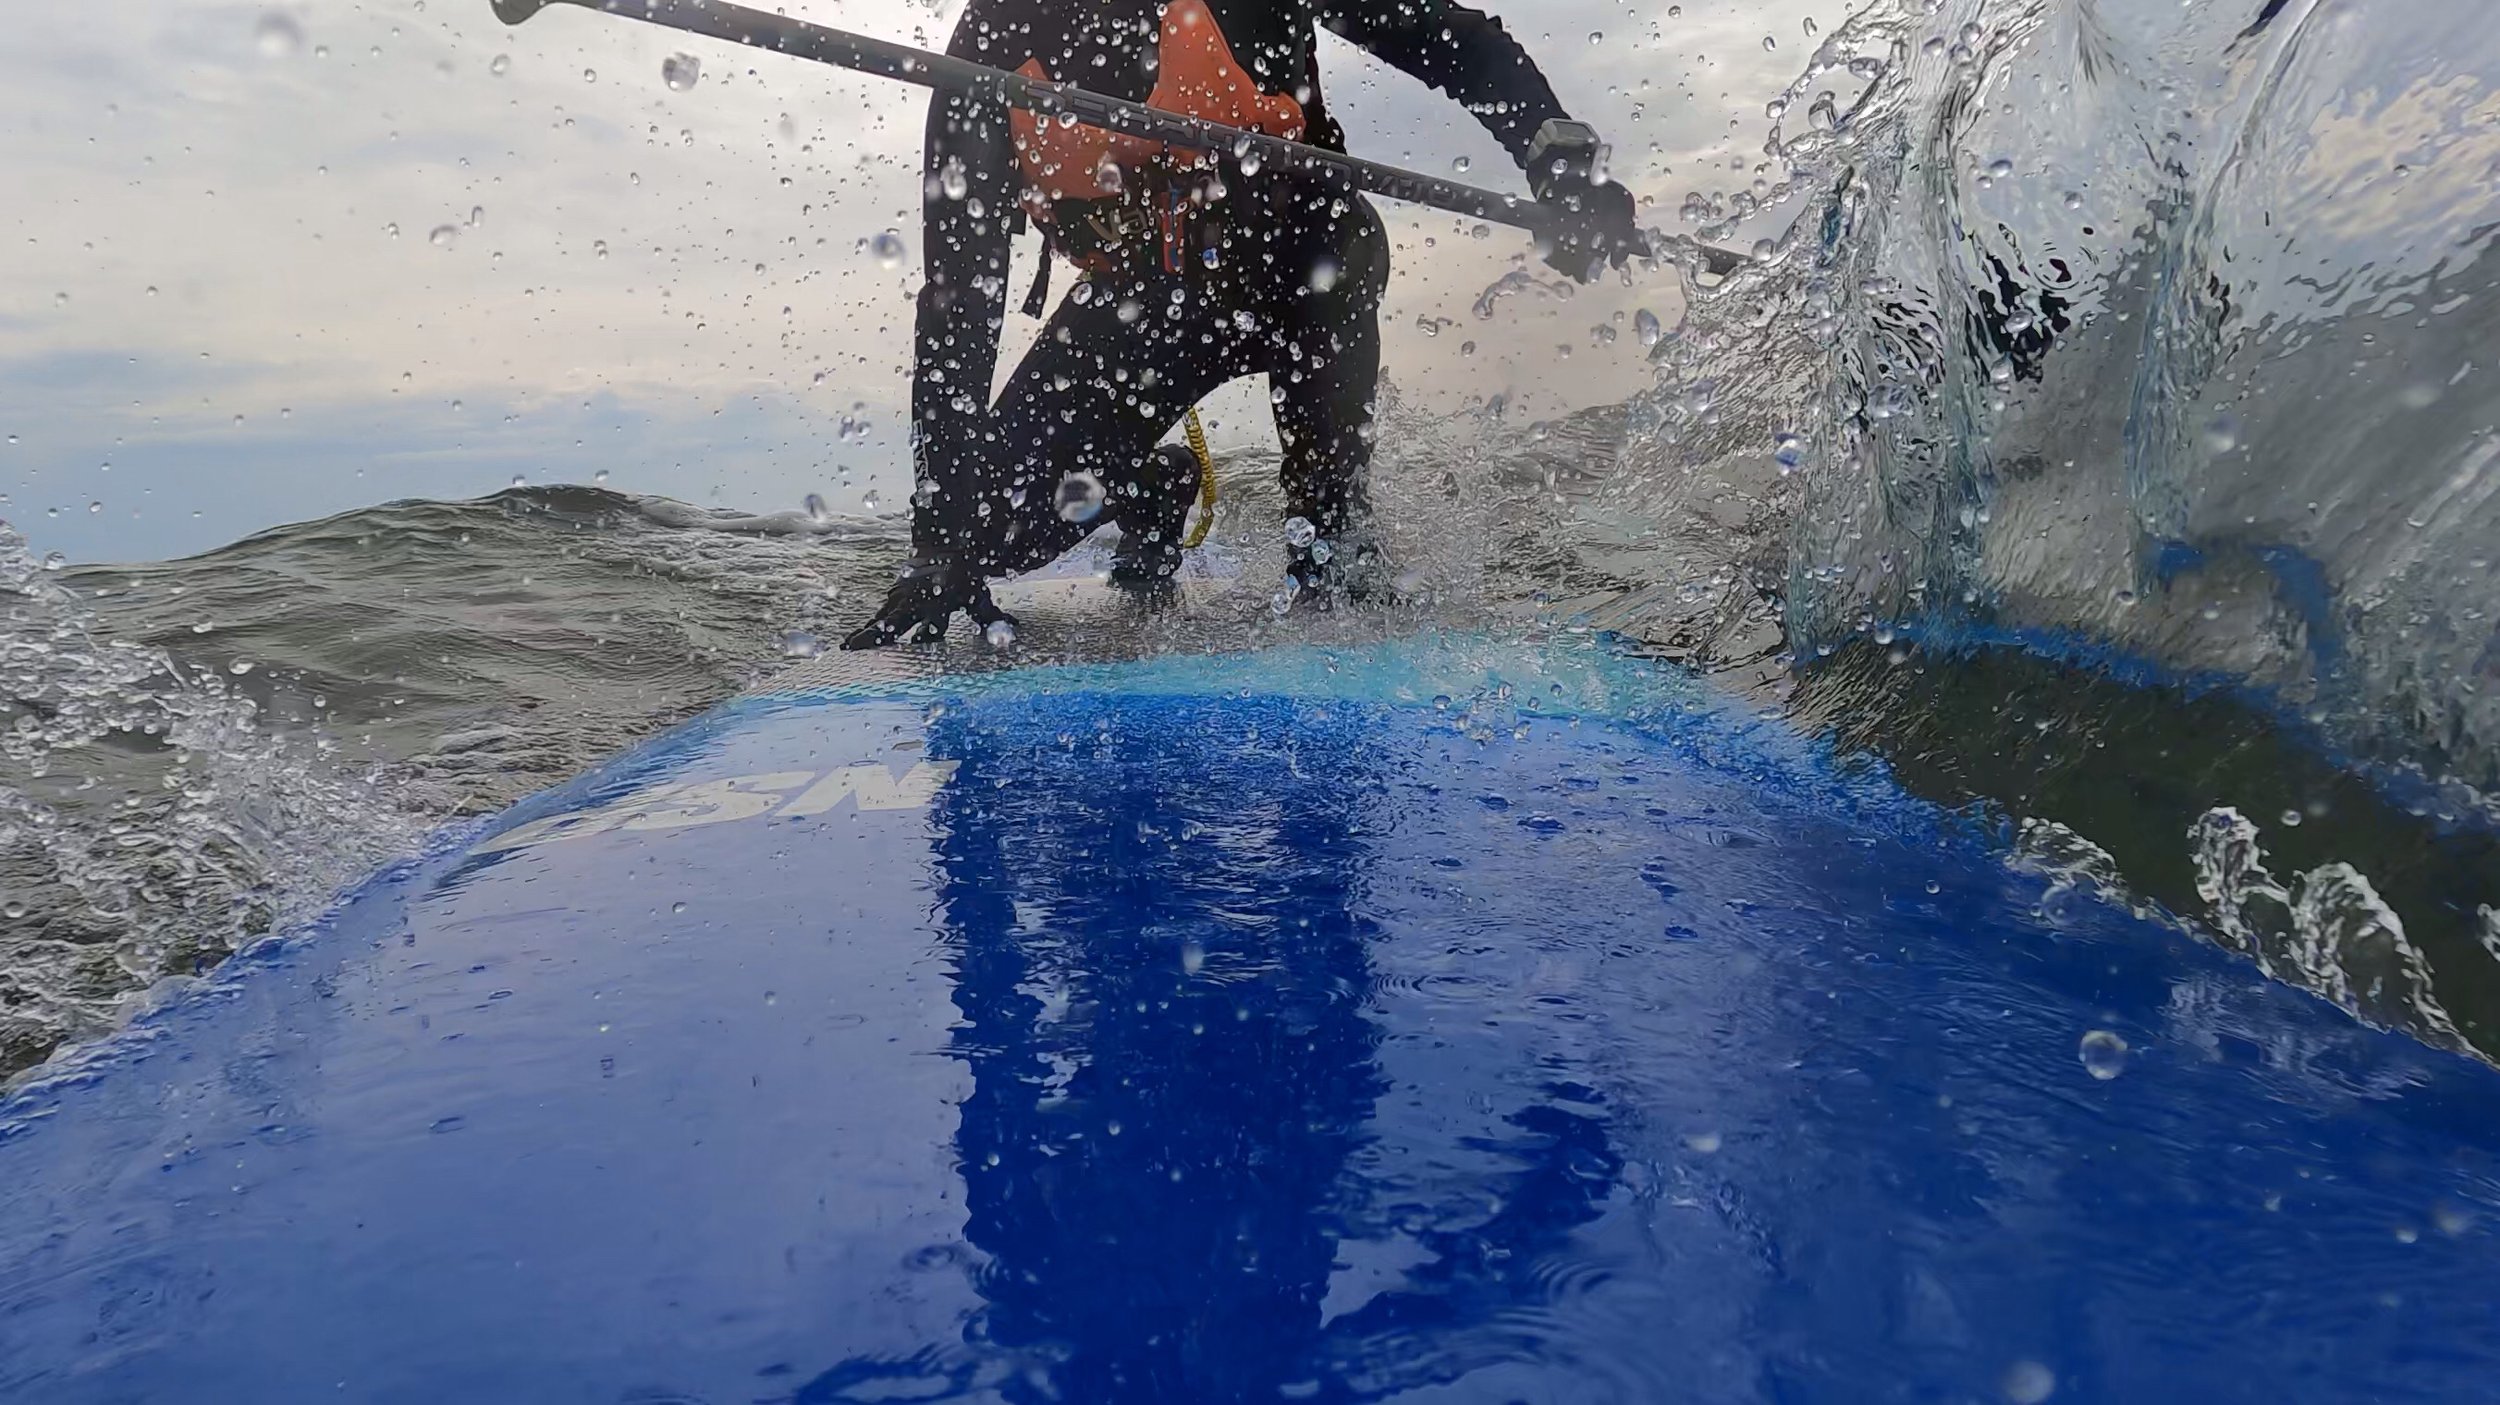
The Fanatic Bee is at a 60 degree angle to the horizon. I pushed on my right hand and knee and leveled out for a surf ride.

SUP surf boards like the Fanatic Bee have rails, just like surfboards. The rail is the rounded edge that allows you to cut into the water by adjusting your feet, body weight, body pressure. In the image above I knew I was going to wipe out because I’d cut into the breaking white water, but in a split moment I decided to push with all I had on the right. Wave momentum changes so quickly that no sooner did I apply pressure, I pulled the submerged edge out and completed a nice little surf (surfing being a sport that achieves it’s high points in a matter of seconds). Only board sports will get you this in tune with what waves are actually doing, and I highly recommend taking some lessons so that you can translate how subtle shifts in your body pressure and position will also make great though subtler changes in surfski and outrigger.

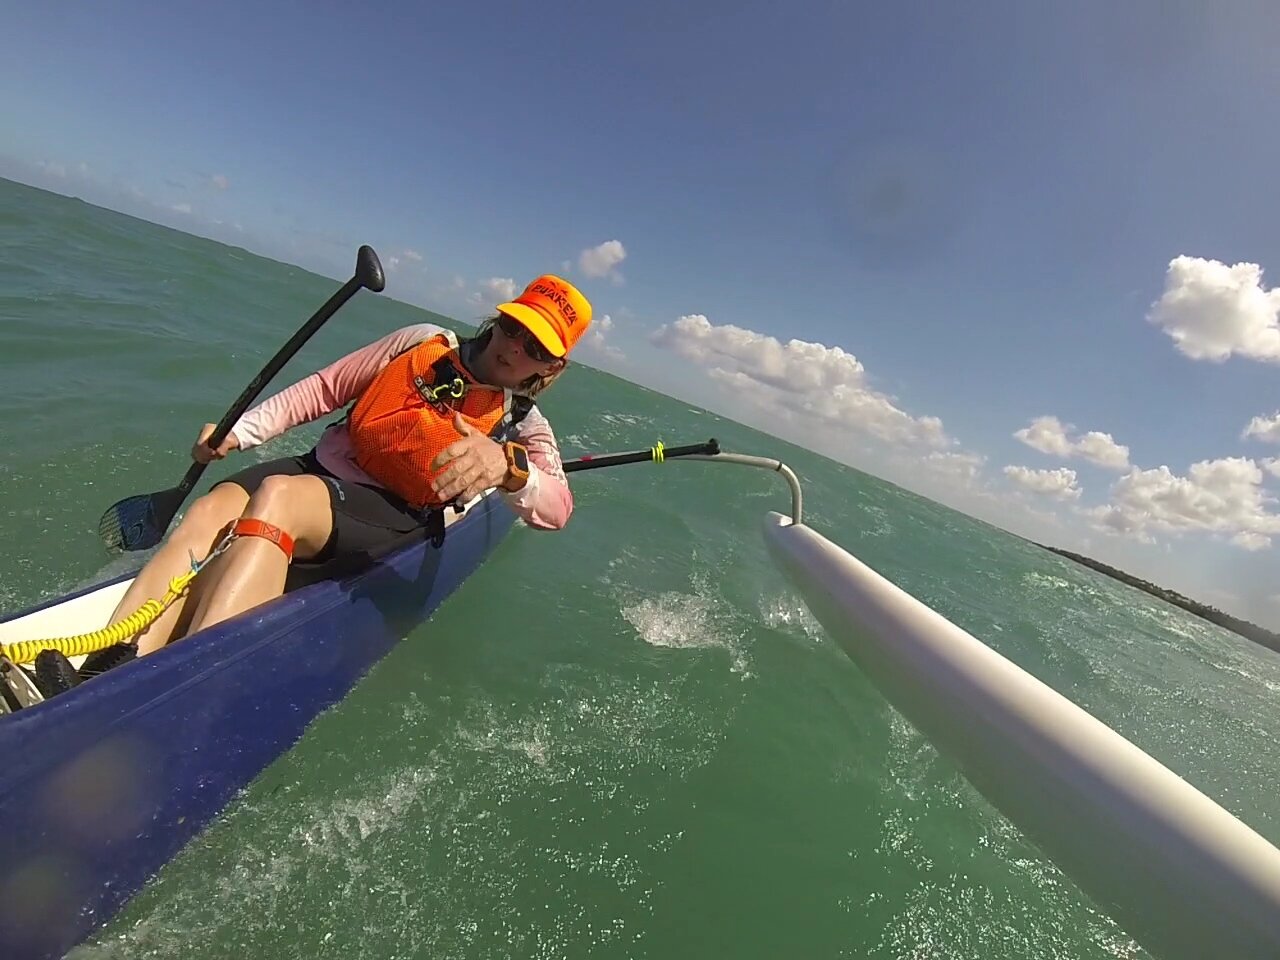
The surfski is pivoting downward to the left and I counteract the roll by intuitively leaning a little right and continuing to paddle.

In the image above I’d just turned on breaking waves. Winds were the end of Hurricane Nicole and crossing the incoming tidal swell. Surfkis allow you to paddle in any direction, regardless of swell and wind direction. A subtle lean into or away from any condition gives the momentary assist required to stay upright and on track. While SUPs also allow you to paddle in any direction, you become a mast and have to work much harder against the wind.

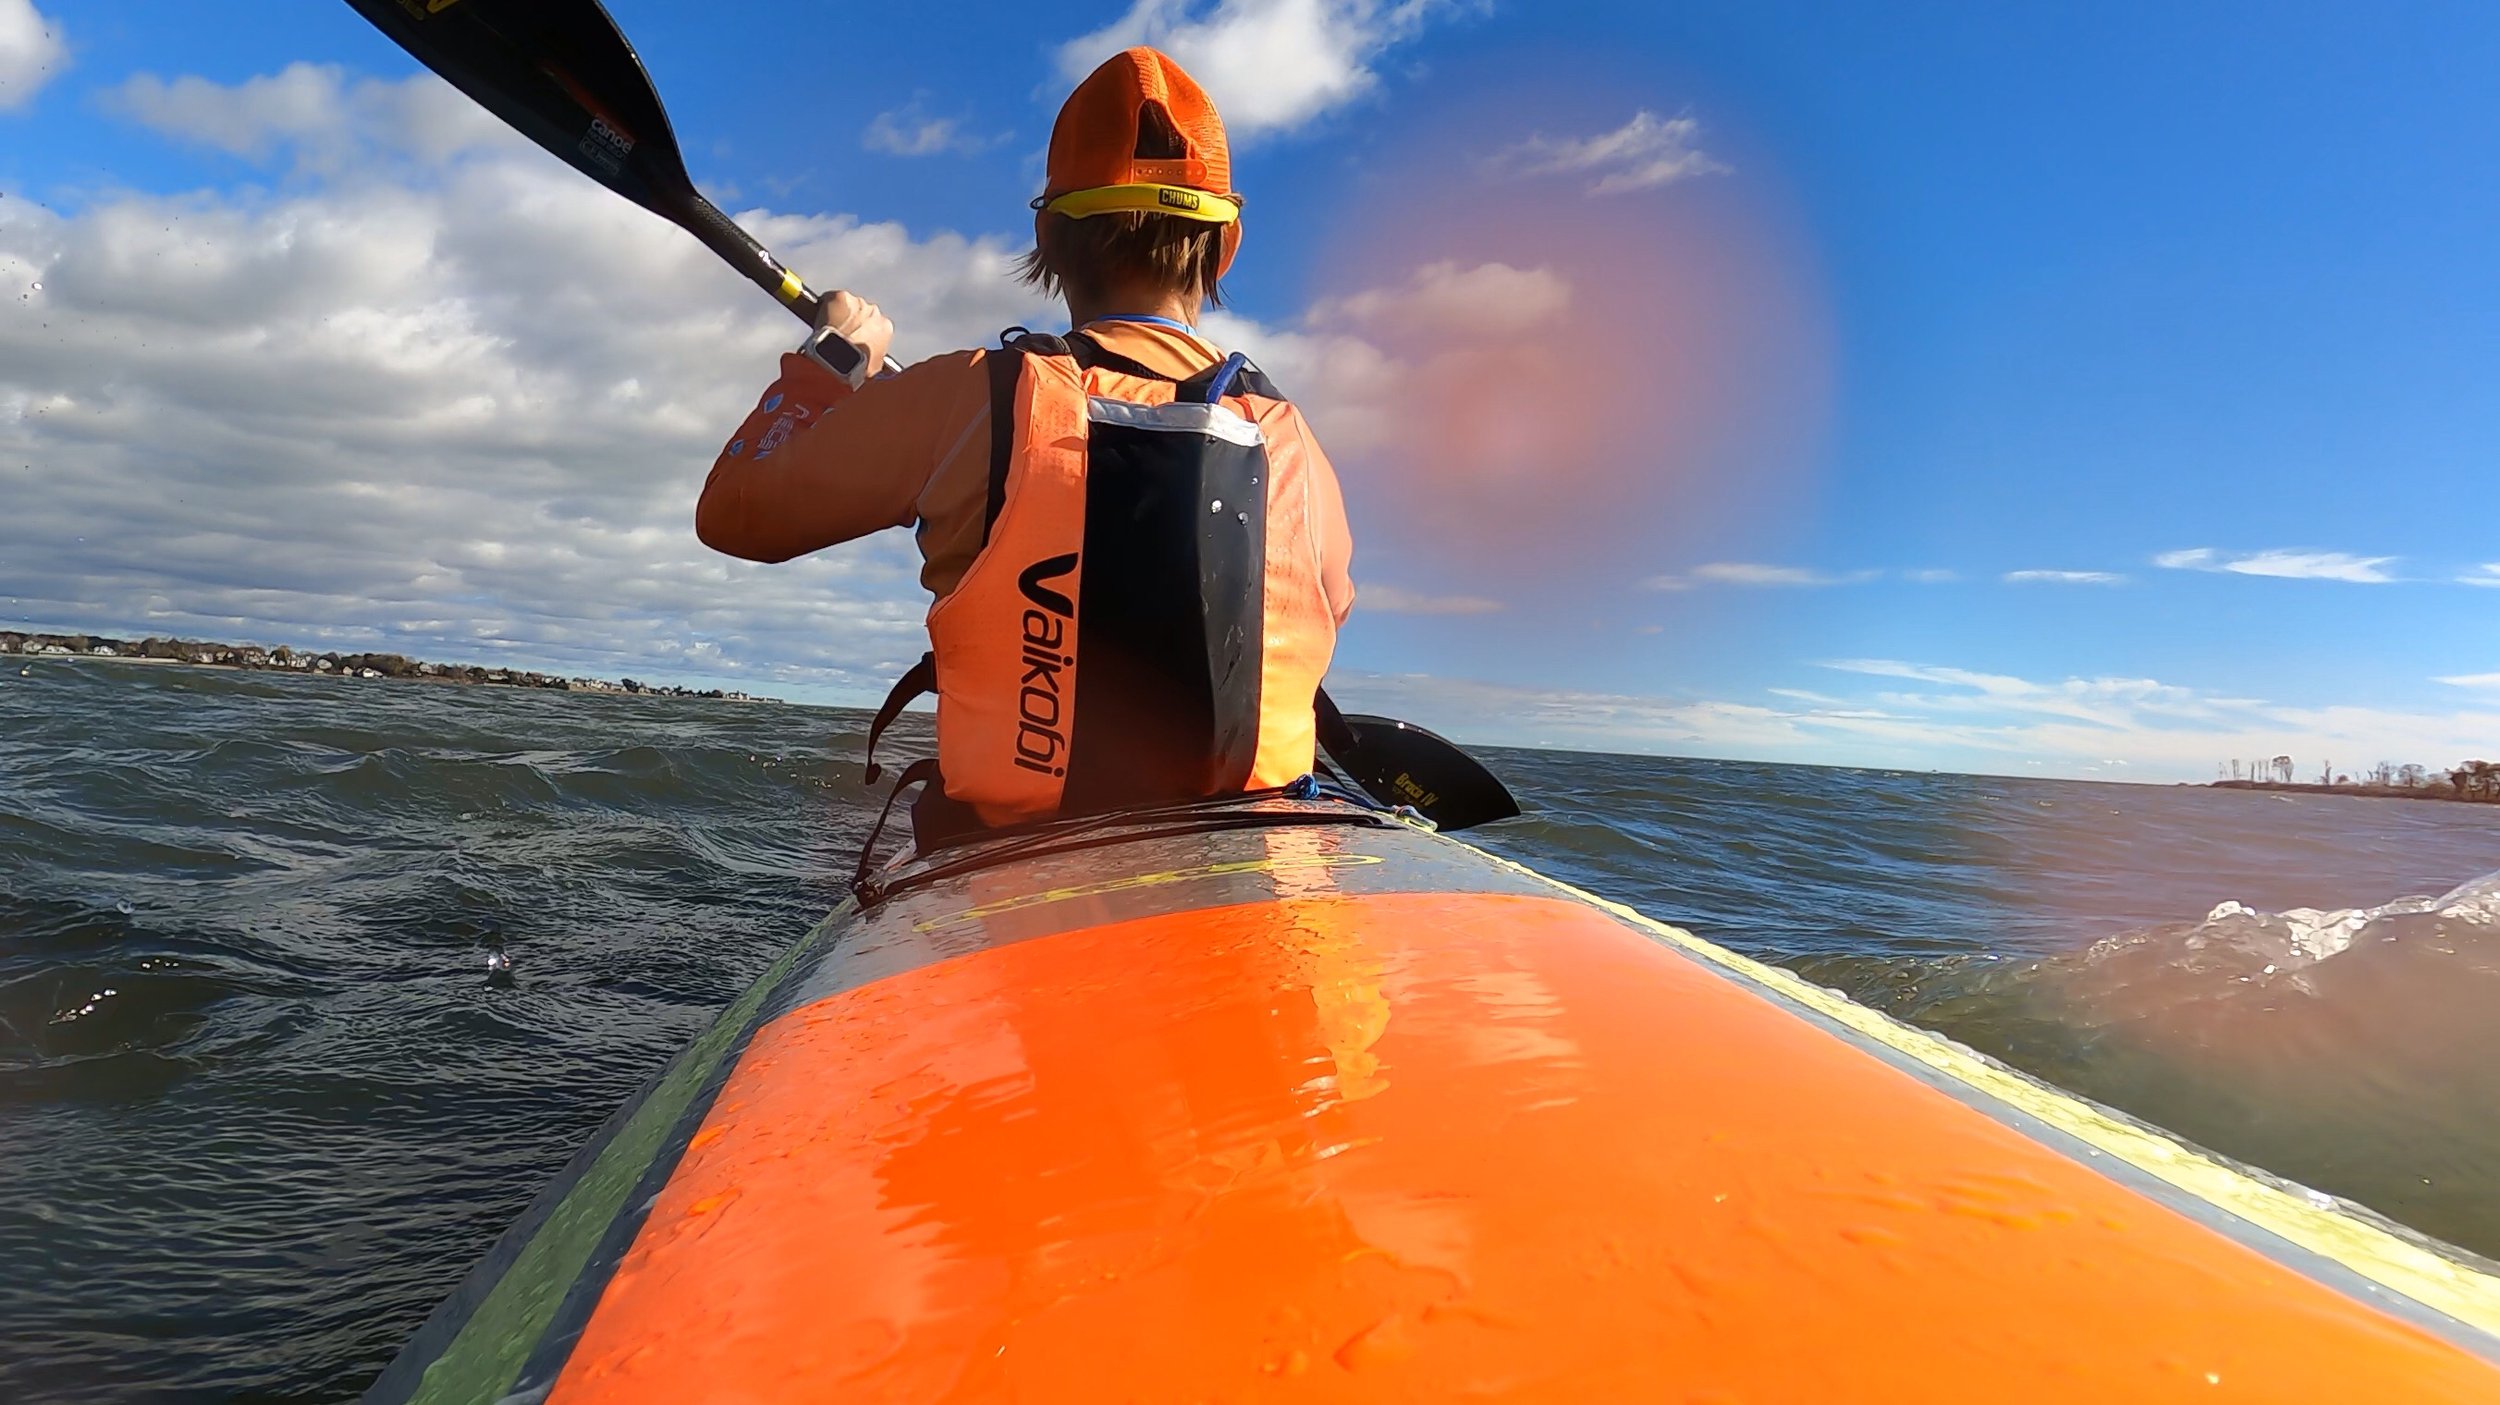
Stabilizing going upwind on an NSP Sonic downwind board.

In the image above I am paddling out over incoming swell. There is about .5 mile of rocks extending from the shore behind me, so I ducked, lowering to stabilize over this 5’ wave. While some of these boards are rather rocky and rolly, and you will develop strong leg muscles, spending time on one makes getting onto a 32” board all the easier.

In conclusion, I don’t win races, and I don’t even really race. But I am always up for getting a gold medal for having a good time. Any cross-training at all will make your time on the water more enjoyable. When strong winds almost repeated the race conditions that handicapped my left side the year before, and several racers dropped out after one course, I turned the buoy and headed back out alone, managing the wind and the ama and my center of gravity with considerably more mastery than I had the year before. And it was not because I’d spent more time on my Kahele. It was because I’d face the same conditions on a surfski ond on boards. In this case, echoing Oscar Chalupsky, stability breeds confidence, and confidence breeds stability.

If you have not yet read his book, No Return, No Surrender, I highly recommend it.

Apple Watch Review for Paddlers

I was coming up on logging 200 miles of paddling on an OC1, and with a brand new Kahele replacing my vintage Puakea Kaku, I knew I was not going to improve without the better canoe and hard metrics. It was time for a smartwatch. I had spent the last year using a $12.99 knockoff G-Shock. That could tell me how long I had paddled, and I could get a decent idea of my per Km rate, per mile, what have you. What it also told me is that I could paddle comfortably with a watch. The obvious upgrade was a Garmin, and the stars pointed to the Fenix 5.0, top of the line, etc. What had put me off about the Garmin was that it really isn’t for paddlers. It’s a runners watch. Then a mishap at Woo downwind camp in January 2019 really made me rethink the Garmin. This was in fact a failure of the watch band. Witness this great downwind video, with Adam showing off his style; however there is a subplot. Witness that the video starts with him wearing the Garmin watch, but soon it vanishes, never to be seen again. Adam was able to pinpoint the exact video frames showing the failure of the watch band and the watch dropping into the sea, hardly what you want a GoPro for. Goodbye expensive watch!

So, I put serious time into researching watch bands. Due to the numerous Apple watch bands on the market, this placed the Apple watch onto my radar, which I had never entertained because I don’t know any serious paddlers who use it. More research proved that apps had been developed for the Apple watch that were expressly for paddlers, and when I discovered that the Apple watch 4.0 is virtually a standalone PHONE, I took it seriously. That is, after I did a fair amount of research on sport watch bands and apps. A visit to the Apple store involved some hard questions for the salesperson, who showed me how to put apps on the watch, showed me the Nike sport band - which has a similar quick release button that resulted in the failure of Adam’s Garmin. I was also shown the Walkie-Talkie feature and, most critical, the Phone and SOS features. The salesperson advised me to go to Amazon to look for any number of third party watch bands that would suit my purposes. I bought the Apple watch 7.0 44mm (Nike), and let’s just say I’m thrilled.

UPDATE 2022: I upgraded to the Apple watch 7, GPS/Cellular 45mm. The battery life of the 4.0 was still decent (85%), after very hard daily use and over 1000km a year paddling, but my main interest is in the SOS phone option, so it seemed wise to upgrade. In addition the larger face with an ALWAYS ON option makes a difference, especially on the water where a quick glance at the face is all you have before you get hit with a wave.

I chose the Nike face because I want a bright large screen. You’re stuck with the Nike app (which I don’t use) but you can choose the others. I added Waterspeed, weather and at the bottom a stop watch. Choose whatever face you want. You may want to …

I chose the Nike face because I want a bright large screen. You’re stuck with the Nike app (which I don’t use) but you can choose the others. I added Waterspeed, weather and at the bottom a stop watch. Choose whatever face you want. You may want to do this via your iPhone.

SUPcase does not stand for stand up paddling. Anyhow this is what I purchased, a SUPcase watch band for around $23 on Amazon.

SUPcase does not stand for stand up paddling. Anyhow this is what I purchased, a SUPcase watch band for around $23 on Amazon. UPDATE 2022: These cases hold up. I am on my third because they do fade and get dirty. I buy the lighter colors for contrast in the water. I wear it all day long, ocean, yardwork, rough activities - and the Apple watch itself remains pristine. Just wish they had more sport, bright colors!

The Apple watch has excellent water resistance. Please know this is not a review for divers but for people like me, who get wet a lot but do not submerge to any depth unless of course we fall in the waves, where a waterproof band is not required. The Apple watch has high water resistance AND a water lock feature, which you can manually turn on OR your water sport app will turn it on. This feature is built into the two apps I will review, Waterspeed and Paddle Logger. I will go into this water lock feature in a little more detail because I didn’t know about it and thought the app was frozen after I first used it.

Credit goes to iDB for this image and you can read more about how to care for your Apple watch here.

Credit goes to iDB for this image and you can read more about how to care for your Apple watch here.

When you swipe up from your home watch face (there are many you can choose from), you get the layout on the left. The water drop icon activates water lock and also makes it so you can’t swipe the screen. When you’re on dry land and you want to deactivate the water lock, turn the digital crown per the directions and some mystery function ejects water. Don’t ask me exactly how this works; suffice it to say my Apple watch spends a lot of time in salt water and everything is good. No need for a waterproof model such as is manufactured for divers for us paddlers. The SUPcase I chose protects the edges and face of the watch as a “bump guard.” Most importantly to me it does not have a little quick release button that could fail, and it has a traditional clasp, so it is easy to take on and off. There are no pins where the band connects to the central section snugging the Apple watch proper. I did add a screen protector film as well. I use a cleaning solution such as I use for my electronics once I get off the water. You have to insert the watch in a sequence and it is next to impossible to push it out when you are wearing it. Many competitor watch bands have some negative reviews for failed pins. This one just doesn’t have them at all.

FireShot Capture 071 - Waterspeed for Sailing,Windsurf,Kite,Paddle SUP with Apple Watch GPS_ - www.waterspeedapp.com.png

Waterspeed

My first choice app for paddling

Waterspeed bundles a lot of data into their app. You can choose your water sport and go from there. You are best off going to their site to check out all of the features. (UPDATE 2022: The app is constantly upgraded, so that just when you have everything set on your watch, it goes away and you may have to tweak settings all over again. It is a nuisance to reset the watch to keep the APP face active during use. However, it is still a better app for the price. Go to settings, RETURN TO CLOCK and set it for After 1 Hour. This is the max you can show an app on the watch face, which runs the battery low, so it is not a default.)

I will summarize why this is great for me: as a novice who is transitioning to intermediate paddler I need to know more than just where I paddled, how long and how far. I elected to review my data in kilometers, mostly because my goal is to train for a 50k open ocean race. I now train in the ocean and practice 1 kilometer sprints and various techniques. Later when I review, Waterspeed breaks the data up into 1 kilometer splits. Heart rate data is included as is some basic wind speed data. You can replay the mapping as a video and you can also edit out the pieces that are not relevant. For example if I forget to turn the app off, and it shows my path walking around the beach - that can be removed. I can edit out my time on the water prior to race or sprint start and edit out the end. Etc. I paid for the pro version, which costs about $4 per quarter. You can see some data on your watch, and when you are paddling you can see your actual speed, distance etc. But for analysis, you want to use your iPhone or iPad to see everything on a bigger screen. So, just sync the app’s diary and it will only take a few moments for the data to appear on your other devices.

UPDATE: I’m not a novice paddler anymore. I use the watch for surfski, SUP and SUP surf. In SUP surf I am in the waves a lot, and the watch holds up just fine. I also paddle all season. In the winter I have to wear the watch over my dry suit, which prohibits some of the tracking features, like heart beat.

I don’t think about my Apple watch at all in any conditions. It just works, and especially well in the SUP case.

The scissors are the edit icon. This is a race log. So the slower parts of this log (waiting for the race to start and a slow paddle afterwards), can be edited out and the actual km/hour rate recalculated. Or you can use the slider button and scroll…

The scissors are the edit icon. This is a race log. So the slower parts of this log (waiting for the race to start and a slow paddle afterwards), can be edited out and the actual km/hour rate recalculated. Or you can use the slider button and scroll through the visual data, zoom in and even play it back. Lots of data!

This is an overview. Here you see the play button, which allows you to watch the visual log. Here you also see the export button. Not only can you export images you can export DATA as a CSV file. This is really nitty gritty, and I have not needed to…

This is an overview. Here you see the play button, which allows you to watch the visual log. Here you also see the export button. Not only can you export images you can export DATA as a CSV file. This is really nitty gritty, and I have not needed to use this data just yet. But it’s there.

This is the editing screen with its options.

This is the editing screen with its options.

Let’s take a look at the other app on the Apple Watch market for paddlers, Paddle Logger. A novice friend of mine uses this, and this fits her needs. She basically just wants to see where she has paddled, how long and how far. I tried this then paid to “unlock” the pro features, which turned out not to include and heart data, no splits, etc. This costs about $3 or $4 per month, and when I really could not find improved data, I emailed the developers, who told me it did not have what I was looking for, so I cancelled the subscription.

IMG_1873.PNG

Let’s get down to what is really awesome about the Apple Watch 4.0: it really is a phone. Granted you must already have an iPhone and using this as a phone will cost you another $10 per month on your data plan. BUT you do not need to carry both at the same time. I have an iPhone 7 plus which is basically a phablet and way too big to carry in my PFD along with my radio and my emergency beacon. Since I always paddle reasonably close to shore in the US, there’s a good chance I can make a call from out on the water if need be. If friends also have Apple watches, we can use the built in Walkie Talkie feature. Then it comes down to the fact that your contacts, music, etc. are all on it. You can ask Siri to start Waterspeed, order a pizza, talk to Mom, text your boss you’re “sick” because there is an awesome swell - whatever you want and expect from an Apple product. I am beyond sold on the Apple watch. The paddling apps will only get better. In closing I’m going to plug the app that I don’t use for a feature that Waterspeed SHOULD have. This is called PIT - paddler in trouble.

Don’t paddle if you can’t make it back to dry land. If you get into trouble, have a plan. PIT might be one of those plans that works for you.

Don’t paddle if you can’t make it back to dry land. If you get into trouble, have a plan. PIT might be one of those plans that works for you.

PIT is a function of this app (yet to be released) which allows you to set a timer for the duration of your expected paddle. If you don’t shut it off before the timer counts down, it will ask you if you’re ok and if it gets no response it will text whomever you have set it up to dial. There are other guardian type apps out their that do this as well. This is a GREAT idea. But greater even still is knowing the weather, knowing where you are paddling, paddling with others and ALWAYS inspecting your gear for possible failure (leg leash, my friends) before you head out. As much as I love this feature I will text a buddy I’m going to be out for an hour than end up paddling for three. So, I’m going to do my final wrap up on this by THANKING PADDLE LOGGER for showing me the workaround. This is the built-in SOS function on the Apple watch. So, if you have an app running and your phone is in water lock mode, how do you make an emergency call? You press the lower button and HOLD IT down. An emergency call will be placed. The short video shows how the SOS feature overrides the Waterspeed app (or Paddle Logger or whatever). The long video is me going over my watch. It’s a little long and tedious, but if you’re going to drop $500, worth the time. I did not find any videos on the Apple Watch for paddlers when I looked, and so I write this entry not to sell watches but to make paddling SAFER and spread the good vibes. This watch not only makes me safer, but I have to say I’m already a minute faster per Km from the data feedback. So there you go. Stay safe people. The water is a blast, but the return to the beach is always our goal so that we can do it all over again.

Slow motion footage of SOS activation.

XOSS G/G+ Speedometer and Strava for Paddlers: an affordable speed coach

A $56 USD speed coach for paddling.

XOSS size.jpg

The Xoss G/G+ is an affordable solution for live technical feedback during training. Other options marketed to paddlers tend to cost around $400 and are marketed independently for surfski, SUP and outrigger - meaning if you paddle all three you would have to spend around $1200 for standalone units. I spent $37 USD on the Xoss G/G+ and $19 USD for a standalone cadence sensor, which I can use with all of my vessels.

Connected to the foot brace on my Nelo 520.

Connected to the foot brace on my Nelo 520.

The XOSS G/G+ is waterproof rated to IPX7, meaning it can withstand heavy water droplets and be submerged to one meter for 30 minutes. I still put it inside a $10 USD Dripac because the rubber plug that covers the USB charger connection could fail. Cheap insurance. (I had this type of USB plug fail on a Standard Horizon marine radio).

The battery life is 25 days with use at 1 hour a day. In other words, take it out for a long paddle and it will last all day.

HOW TO SET IT UP FOR PADDLING:

1: Charge the included lithium battery with the USB cord provided.

2: Turn it on with the right button. Wait for the initial screen to come up showing 00:00 in the data fields.

3: Press the left button once. This initiates the GPS, which scans for a satellite signal. You should be under a clear sky. If you try it inside or under a covering, you might not pick up the signal. While it searches it will flash a little GPS icon on the upper left. It will beep when it locks in and the GPS signal will become steady.

4: Go paddling.

Yes, that’s it. That is all there is to using it as a real time speedometer. The speedometer data is the largest data and pretty easy to read. I prefer km for speed and distance, which is the default setting. If you need to change defaults do this before you go out for a paddle. You can get the pdf manual here: Xoss G/G+ manual.

FireShot Capture 357 -  - www.xoss.co.png

I was able to adjust my surfski stroke for immediate improvements and gain .5km in speed overall very quickly. I’m fairly new to surfski, which is tremendously technical, so figuring out how to position the wing blade and press down in the water as I rotate to gain speed was very satisfying. It was also very satisfying to have only spent $37 USD to get a speedometer. What I did not realize is that Xoss also has its own app which connects to Strava (and other software). If you want to review your data on your smartphone follow these steps:

1: Download the Xoss app. (You can use the QR code that comes with the instructions to connect to it).

2: Download the Strava app.

3: You will need to have a Strava account and a Xoss account confirmed through an email. Once confirmed you are ready to connect the Xoss G/G+ to your phone via Bluetooth.

IMG_64D21B46B9C5-1.jpeg

CONNECTING THE XOSS to your phone and Strava via Bluetooth.

1: Open the Xoss app. Click on your device. (Bluetooth must be on). It will bring up your device. Click on that, and it will load a page where it syncs to the Xoss. Here you also have to connect to Strava. Be patient. It took me a few tries. VERY IMPORTANT: You can’t sync data if the Xoss is still recording. To stop recording LONG PRESS the left button once.

2: It will recognize the data but there is a little button you have to click for the full sync to Strava.

3: Once synced you can click the Workouts icon and it will open the Strava data inside the Xoss app. Here you can review data and also watch a video of your paddle.

Xoss cadence.jpg

After poking around on the internet and looking at the instructions I soon realized there are add-on sensors. The Xoss G/G+ unit is a speed sensor but you can add a cadence sensor to it. This is what you see in the image above. It can be confusing because they are also sold in 2 packs as speed and cadence sensors. These are standalone sensors that can be synced to your phone, if you were just using your phone as the data screen. They are also identical sensors and each sensor can be used for speed or for cadence based on a setting. I only wanted cadence because the Xoss G/G+ is my speed sensor and screen.

If you want a cadence sensor buy a single unit, remove the battery and reinstall. If a blue light comes on it has been switched to cadence sensor. Yes, that is correct, merely by taking out the battery then putting it back in, you change the function of the sensor. You can use the Bluetooth connect screen in Xoss to find the sensor, and if you swing your arm around in a circle it will start registering the “cadence.”

The cadence sensor instructions show you how to mount it on a bicycle pedal. It put mine into another Dripac bag and just clipped it to the center of my Braca paddle. For outrigger I would tape it to the base of the handle. For SUP tape it below your lower hand on the shaft.

Follow the Xoss directions for pairing your sensor to the Xoss G/G+, and in less than a minute you will be able to see your cadence data while you paddle also. The display for this data is small, so I just review it after I paddle on my iPhone.

You may not care why the sensor works just as well for paddling as it does cycling, but I will explain anyway: the same sensor that knows whether your phone is “up” or “sideways” for changing the display is called an accelerometer. These are used for XYZ positioning. The computer program then uses this data to perform the next step. In the case of the cadence sensor it basically takes a rotation and calls it an RPM. As long as the sensor can pick up your paddle rotation, it will log the motion.

Read RPM as stroke per minute. This is surfski stroke data. This will work for any paddling sport.

Read RPM as stroke per minute. This is surfski stroke data. This will work for any paddling sport.

Ocean conditions change all of the time, so stroke rate varies considerably. Here I tried a high rate upwind and a low rate downwind. I expect to vary my cadence during race conditions and will use the speedomter as my guide during the race.

Have fun, stay safe, and see you on the water!

ARDUINO ADDENDUM: I make small electronics and have all of the parts I need for around $25 USD to make a speed coach type of computer using Arduino programming language. The biggest issue is getting a good readable screen in a watertight housing. Apps are also available for iPhone and Android that accomplish the same thing, but the phone battery life struggles during a long race, and the phone overheats in a waterproof case. If you want to make your own Arduino speed coach, you can link to that kind of project here: Arduino.

Downwind Paddling: On Becoming a Downwind Paddler

It is March 2021, and I have spent more seat time in my Puakea Kahale than ever, in large part due to the need for social distancing. My local club started going out in our 6-man canoes late last summer, and several of us had been going out together in the smaller 1 and 2 seaters, but for a number of reasons I am still adhering to strict social distancing guidelines and not participating in any group sport activities or races. And while I miss the camaraderie of the big boats, the wind and waves and I have gotten quite close during the pandemic. If you want to get good at downwind, you have to paddle downwind. Solo. As much as possible.

GUAD2020DesHaies.jpg

In January 2020 I attended the Woo downwnd camp for the third year in a row. My skills had improved greatly, and I paddled the Woo Outrigger, French-made Feline as much as possible, as it was similar to the Kahele in length and volume. I did not huli once, no matter how tempted the Feline was to flip me, and I found some considerable speed and reasonable consistency on our daily runs.

Guad2020SurfAmaFlyinPOP.jpg

My French coach Alain remarked that both my paddling and my French language had improved. There is no better way to stroke a paddler’s ego than to notice something they suspect: improvement. I recognized, however, that I would do much better on a Kahale, principally because it is lighter and has the improved steering with spring return rudder.

At the airport in Pointe-de-pietre in February 2020, as paddle camp wound down and we all returned to our home countries via this small international airport, I saw my first notices about travel restrictions into the USA due to coronavirus. A flight headed toward Miami earlier in the day returned a passenger who would not be allowed to depart there. Passengers who had been to inland China had to get rerouted onto New York bound planes, like mine. By the end of February I felt like I had a virus, though the news was not very clear as yet, and while I noticed the strange symptoms of the virus, I thought little of it until later. Within a few weeks restrictions increased, and the local club’s future went into limbo. I went out into the Atlantic Ocean by myself and started getting to know it quite well. For the duration of 2020 until now, my local waters are my university.

It had been a couple of years since I had started reading and then rereading WAVES by Fredric Raichlen, and while I got the basics I had not ever really seen my local waters as a system I could study. Having always paddled along with the bigger boats in the club, where surfing was seldom our focus, I tagged along regardless of wind conditions. But on my own I began to study the wind direction and tides. Soon I recognized the telltale signs of downwind runs, the curling horsehead waves running in the same direction. In my local waters sometimes these wave train patterns are only a couple of hundred feet wide or even less. Within these conveyor belt systems I discovered I could do 1 kilometer runs over and over again.

There are about seven small breakers in this image. A dark line behind me and closer to the horizon is another breaker. The further out I go, the bigger the swell. Closer in, the waves bunch up on the shallow sand.

There are about seven small breakers in this image. A dark line behind me and closer to the horizon is another breaker. The further out I go, the bigger the swell. Closer in, the waves bunch up on the shallow sand.

I live on Long Island Sound, where on any given day, as long as I have 10 knots or better wind, I can downwind north, south or west. 16 knots is optimal for solo downwind. But approaching 20 knots, solo paddling is ill-advised. East directed waves will push me out to open water, so despite the temptation, I never downwind away from the shore even if the windspeed is below 15 knots. One of the key insights to downwind is that the waves actually don’t need to be big. As long as wave trains are moving in generally the same direction, even small bumps are surfable. In the video below, I am teaching a friend how to catch the swell rolling to the north. I can see the low bumps ahead, and I know more are coming behind me. So I keep a steady pace, and when I feel the stern lifting behind me, I pick up my stroke to match the speed of the wave. When they are the same, which is something you basically can both see and feel, you can let the momentum of the wave puch you. In this way, downwind paddling technique is more of a high intensity sport. You will cycle through speeds with intermittent bursts of power. This might look like flat water to you, but it is not. The swell bumps have a direction and a speed.

In the next video, from 2019, I have stronger swell, which a decent app like Windy will give you in Kj or kilojoules. At this stage in my paddling I knew the basics of what to look for and my timing was improving. Later in 2020, however, I found I had the ability to really hammer the paddle blade in and pull myself onto the face of a wave just so, to drop ono the incline like a surfer on a surfboard. The only way to get the feel for this is to go out in any kind of swell, even if it seems tiny, and try to ride it.

To close out this brief blog on downwind, the power is in the wave, the ability to catch that power takes immersion. Study your local waters for the telltale signs of downwind conditions, and even if they are small, go after them. It will make catching waves of all sizes easier. And once you really get to know your local conditions, you will know what to look for in other conditions, as well as what the bathymetry suggests by the waves above it. Basically, the top waves are travelling in circles, like a conveyor belt rollers, with their patterns often suggestive of what the sea floor looks like beneath them, as they roll against the sea floor and bunch up. These patterns will change with tidal height and flow. In this last video, the water is brownish from the silt churned up by a storm. The swell was quite strong, and I timed it just right to ride a single wave for about 30 seconds.

So, how do you know you’re going from beginner to intermediate downwind paddler? Maybe when you go from not even knowing what downwind is, to having your friends remark they are amazed at your ability to catch a 6” (15 cm) tall wave. Mostly it comes from the first person point of view, where you are running with the wave trains, feeling it - and seeing your average speeds creep up over time. A smartwatch helps with that. I use the Apple watch. Stay safe, and see you on the water!

Paddle Board Leashes (and How to Stand Up)

Maiden voyages of NSP Sonic paddle board and VESL prone board with MetaLeash.

metaleashgoddess copy.jpg

Paddle board leashes are essentially the same leash as an outrigger or surfski leash. This means the inexpensive leashes (and even some of the expensive leashes) marketed for boards have most of the same problems as the cheaper leashes on the market: breakage, slippage, UV rot, heaviness, etc. The stand up paddle board (SUP) paddler has some unique issues, mostly having to do with how you fall. When I bought my NSP 24” Sonic surf paddle board, the seller (Vermont Surf and Ski) had hoped to take me out to a river and give me a few lessons near Brattleboro, Vermont, where I had to drive to pick it up. My first thoughts, as a safety geek, were: how deep is the water, how rocky, how fast is the current… But he was limited on his time as NSP boards were in hot demand that day. He bought four MetaLeashes and told me if I fall off my board, to basically dive sideways so I don’t come down on it and crush the carbon hull with the paddle. Obviously, other crushable things are bones… Luckily when I took the board out on my maiden voyage, I ran into this fellow, below, who got me standing up in five minutes.

SUPLesson071120.jpg

Most people would not buy a race board before getting cozy on a wider, shorter board first. As an experienced ocean outrigger paddler, my comfort level was high enough to bypass entry level boards. The price was right on this used board, which only had a couple of dings I had to repair. Compared to my outrigger canoe, the NSP Sonic looks really wide, but I am in a sitting position with a low center of gravity in the canoe. Shifting that weight upwards was going to be a challenge. This is how we met that challenge: my stand up coach stood at the back of the board and basically used his hands to steady me. He told me to get into a crouched position and start paddling. So, he walked behind me, and after a minute he told me to come up on one foot and (KEY PART HERE) WHILE TAKING A STROKE come up on the other foot into a standing position. Just like that, I was standing. Let’s cover this again: crouch on your knees, come up on one foot, stick blade in water, stroke, come up to standing position with the other foot.

Aha! A brace stroke! What is a brace stroke you ask? There are variations on it, but basically when you see a paddle board surfer leaning on a wave, on the paddle, they are bracing the paddle. When you see someone flying the ama on an outrigger, they are bracing the paddle. And I am lucky that Oscar Chalupsky taught me the brace stroke for surfski, which is the most important one: the one that keeps you from rolling over. In this case, standing up on a paddle board, the board is more stable because you have the paddle blade planted in the water, momentarily “locking” you into a stable position just like a rudder does, while you mess with gravity.

The fellow continued to hold the rear of the board while I stood and paddled (my legs shaking like mad), and I really have no idea when he let go. So, try this with a friend or family member, and make sure they don’t tell you when you’re on your own. The psychology of BELIEVING someone was stabilizing me, even if they were not, meant my brain could not tell the difference between him being there and when he let go. In fact he made it a point to let me know he would not tell me when he was not holding the board. So, I got my first “downwind” paddle on the Sonic my first day out. And in all subsequent paddles, I did not fall off.

Back to leashes. What happens when I do fall? It is more dramatic than a fall off an outrigger or surfki, where you mostly just roll into the water. Your bouyancy is such that you usually don’t go under. Not a lot of countering forces here. But a plunge? You really don’t want to smack the board, with hands, legs, head… And when you do leap sideways, you will submerge further, which means there will be more stress on the leash.

MetaBread_Comparison.jpg

The first thing I noticed while on my knees on the paddle board, was the cuff of my leash. You have to position the cuff so the attachment to the leash is on the back of the leg, otherwise you will squat on the hardware. Issue number one solved, just position the hardware to the back of your leg. But there are other solutions. I have seen a lot of social media images of stand up paddle board paddlers preferring to connect the leash at the waist. While I do make a belt, on my first day out I just connected my leg cuff to my PFD, similar to what I’ve seen others do. I have been selling more and more of the belts lately, so it is worth considering what is comfortable for you. Link to MetaLeash shop: www.metaleash.com.

A note about prone paddling, foil, surf: the MetaLeash also works well for prone, or for any other board activity like foil. A surf leash is in development with a different set of fall parameters, because falling off a surfboard involves very complex forces, similar to paddle board surfing, with a lot of fancy footwork, and surfers prefer straight leashes. Stay tuned or hit me up with suggestions, comments, feedback, concerns, customizations, you name it, I will leash it for you. metaleash@gmail.com

And now for a video of some truly amatuer standup paddle board surfing and some speedy prone paddling. Here we ended up sharing a leash, another upside of a quick release, which is critical for getting out of trouble, possibly critical for a race start or critical if you are sharing! Have fun and stay safe. It is February 28, 2021, 39 degrees F in my local Atlantic Ocean, and that is paddling weather to me. See you on the water!

MetaLeash Quick Release Paddling Leash - SUP, surfski, outrigger, foil, prone
from $64.95

LIGHTER: at 4.5 ounces weighs half of other leashes, floats

SMALLER: 50% smaller than other leashes but still extends just as long

STRONGER: heavy duty webbing, stitching and YKK buckle system, 1600lb jacketed Samson Dyneema retractable leash, stainless steel clasp system (no hidden mystery hardware or plasticware like other leashes)

SAFER: easy to inspect, high contrast (red, orange, hot pink, lime, yellow or black cuff), red, yellow, orange or pink leash, dual quick release/connect for either race start or getting out of tricky situations

SIZING FOR OUTRIGGER, SUP, SURFSKI, FOIL, PRONE: Retractable leash comes in 9’ or 6’ length.

SIZING FOR FIT ABOVE CALF: Leash cuff is to be worn above the calf or connected to waist strap.

COLOR CUFF:
SIZE:
COLOR LEASH:
HARDWARE:
Quantity:
Add To Cart
MetaLeash Straight Leash with Rail Saver
$74.95

Straight Leash 6’ with Shock Coil and Quick Release (for surf, SUP, foil, your choice!) Comes with yellow or orange rail saver.

Color:
Quantity:
Add To Cart